
Thursday, August 11, 2011
Step 6- Orienting the Yellow Corners
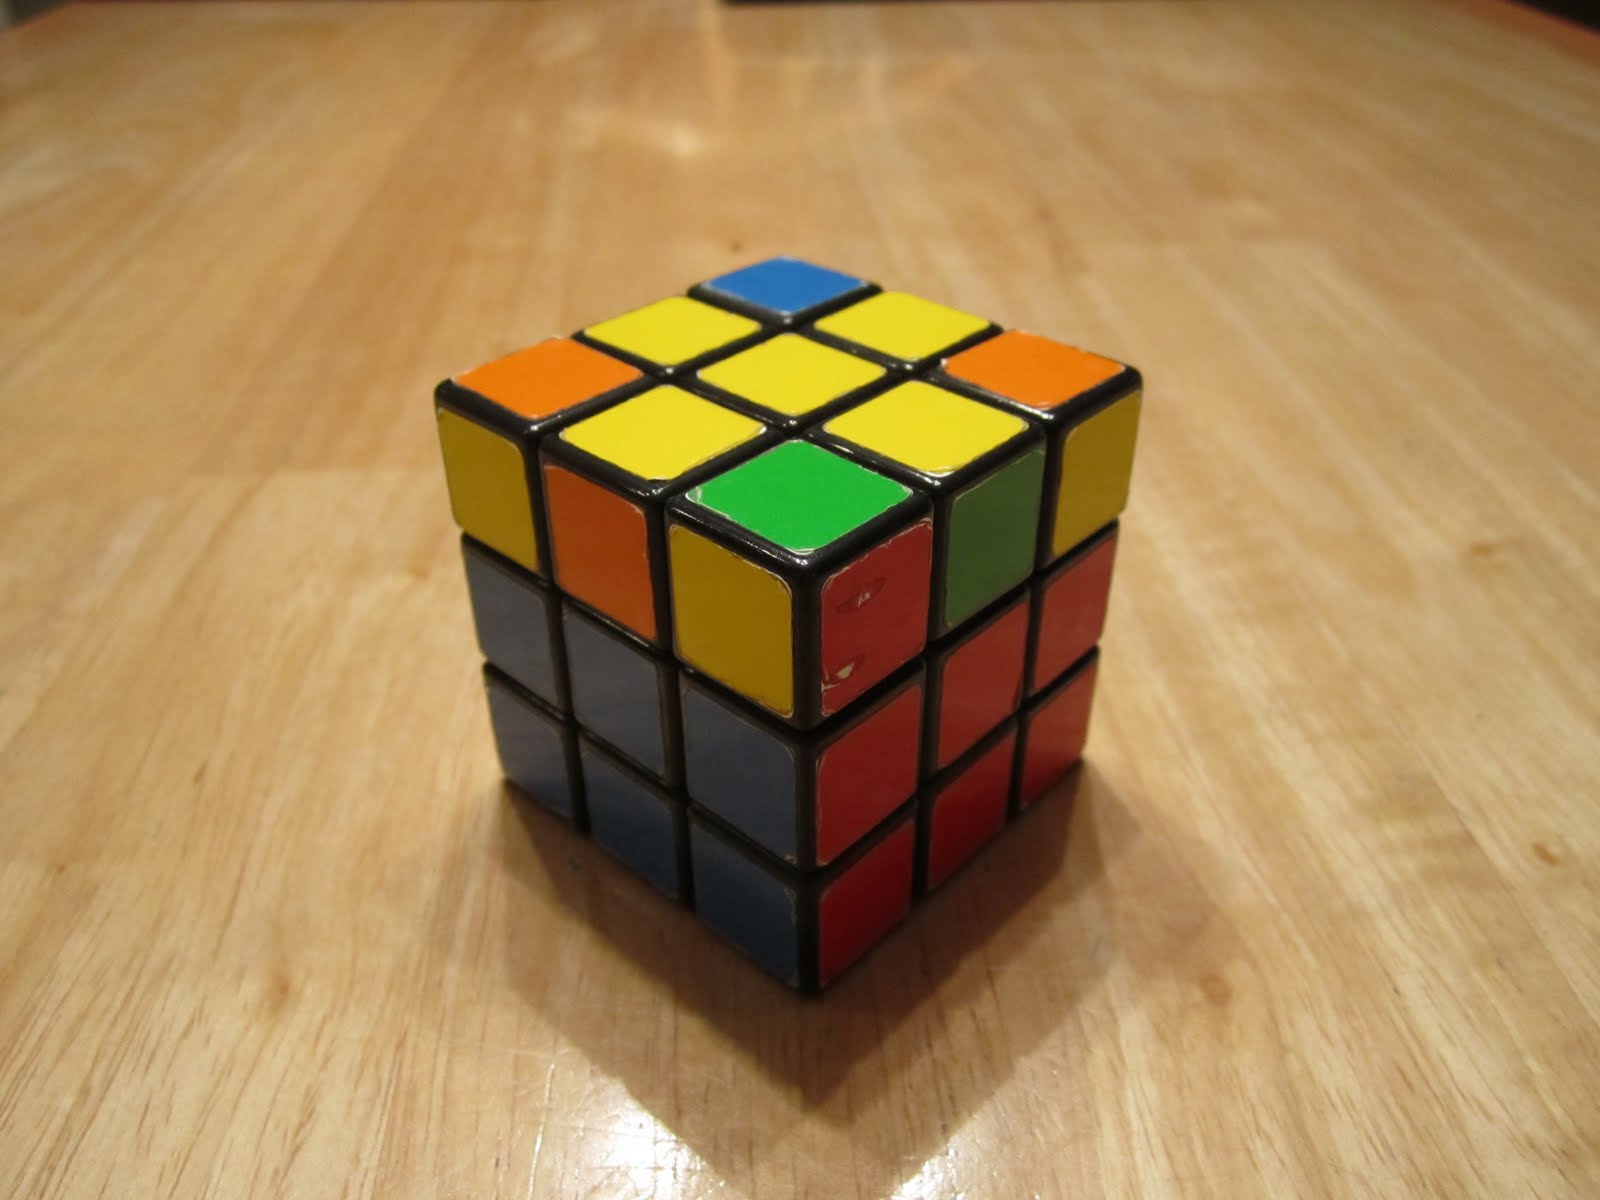
You're two steps away from solving the Rubik's Cube and now you have to orient the yellow corners. There is one sequence and only two combinations. One combination is having two corners matching the center pieces but they are diagonal from each other. If you have that, you use this sequence: r, F, r, B, B, R, f, r, B, B, R, R, u. If you had that or didn't, you will have this combination. The combination is having two corners in the right place but they are next to each other. If you have this, hold it so that those two corners that match are on the face that matches their color and are on the back face. When you have it like this, you can use the sequence that you used before. Now you should have the corners oriented and in the right place. Your cube should now match the cube below and you can move onto the final step! 
Monday, August 8, 2011
Step 5- The Yellow Corners
This step is easy because there is only one sequence. The only real problem is finding out what way to hold the Rubik's Cube because there are so many combinations. Luckily, I have broken them down into three main categories. The only sequence for this step is this: R, U, r, U, R, U, U, r. The first combination you could have is that you have the yellow cross and no other combination on the top face. For this you have to hold it so that the front face doesn't have any yellow on it. Once you have it like this, use the sequence. The next combination is that you have the yellow cross and you have one yellow corner piece on the upper face. To hold the cube correctly for this combination, you have to hold it so that the corner piece on the upper face is in the left corner closest to you. When you have it like this, you can use the sequence. The final combination is that you have the cross and two yellow corners on the upper face. If you have it this, hold it so that one of the yellow corners is in the back left corner of the upper face. When you have it like this, you can use the sequence. After you do the sequence one to three times, you should have a whole face of yellows. Now your cube should match the picture, and you can start orienting the yellow corners!

Sunday, August 7, 2011
Step Four- The Yellow Cross
Now that you have completed two thirds of the cube, you can start solving the yellow cross. In this step, when you make the yellow cross, the pieces don't have to match the sides because you will do this later. All you have to do is make the cross. For this step there are two sequences and three combinations. One of the combinations you could have is that you have three yellow pieces surrounding one corner and another is having just one dot in the middle. If you find these, there can be other pieces surrounding them. For the first combination, you need to have the three pieces surrounding the back left corner on the upper face. For the second one, it doesn't matter what poisiton it is in. For both of these sequences, you use this step: F, U, R, u, r, f. If you had the first combination, then you should have this step done, but if you had the second combination, then you will have the third combination. The third combination is having a straight line of yellows. You have to hold it so that they are going horizontally. The sequence for it is: F, R, U, r, u, f. Now you should have a cube that matches the one below and you can start solving the yellow corners!
The Middle Layer of The Rubik's Cube
As you can imagine, the third step to the Rubik's Cue is solving the middle layer of the cube. To start this process you need to flip your cube over so that the color opposite to white (mine is yellow) is on the top. If you look at what we did before, it was like we made little upside down" T"s on the cube this is a very important part to this step. This step only has two different sequences but it has four different combinations. It you look at your cube now, we would be putting the pieces in between the "T"s in their right place. In order to use the sequences we have to make a bigger "T". To do that, you turn the upper face until a larger T is made. When a T is made the top of that square cannot be yellow, if there is none, that means all of the pieces you need are in the middle layer and are in the right or wrong spots. If you have that situation, then you do one of the following sequences to get it back to the upper face. If it isn't that, you compare the color of the square on the top to either the left or the right sides. If it matches the right side, you need to do this sequence: U, R, u, r, u, f, U, F. Now the piece should be in the right place. If you need to move the square to the left, you need to do this sequence: u, l, U, L, U, F, u, f. Now that piece should also be in the right spot and after you repeat those steps and have the middle layer solved your cube should match the picture below and you would be two thirds of the way done!


Friday, August 5, 2011
Step Two of the Rubik's Cube
Now that you have the white cross in the right place you need o put the white corners in their right place to form a face with all white on it. One combination is that the corner piece you need is under where it needs to be and the white part is facing the right side. To put this piece in the right spot you need to do this sequence: r d R. This will put the corner piece in the right spot with the white matching the pieces of the white cross and the two other colors matching the middle squares on their faces. Another combination is the opposite and that the piece is directly under where it needs to go and the white square is facing the left side. The sequence for this is: L D l. A final combination you could have is that the piece you have is directly under where it needs to go but the white is facing down. The sequence you would use for this is either: r D D R D r d R OR L D D l d L D l. The one you use is determined by which side of the front face the square is on. It would be either the right or left respectively. Now you should have the white corners in the right places. If your cube matches the one below, you can move onto the next step!


Wednesday, August 3, 2011
The First Step of the Rubik's Cube
The first step is to get a cross of one color. In my blog this color will be white but yours can be any preferred color. When making the first cross you have to make sure that the non-white color on that square matches the color right below it. If you have any that are in the right spot, then you are just that much closer to completing the step. If the piece you need is on one of the sides of the cube you can rotate the top and then move that piece to the top row and turn back the top face. The sequence could possibly look like this: u R U. Another place that the piece you need could be is on the bottom face. To put that piece in the right place, you need to have it directly under where it needs to be and do a front turn twice. That sequence could be like this: D F F. After repeating these steps you should have the white cross done and you will be closer to solving the Rubik's Cube!
Tuesday, August 2, 2011
The Solution- Preperation
You're probably visiting this blog because you are frustrated at your mixed up cube and you want to throw it out the window, but wait. Before the cube is out the window you need to try my instructions first. Before we start solving the cube you need to know what all of the "b"s and "F"s mean. For every step there is a series of turns. An upper case letter says that if you were looking at that face you would turn it clockwise. A lower case letter would represent the opposite. The letters represent each side of the cube; F means front, B means back, R means right, L means left, U means upper, and D means down (bottom). Now that you know what each symbol means you will be able to start solving the cube in my next blog!
Sunday, July 31, 2011
Welcome!
Welcome to my blog! This is where I will help to show you how to solve a Rubik’s 3x3 Cube. It’s so easy, I even taught my mom!
Subscribe to:
Comments (Atom)